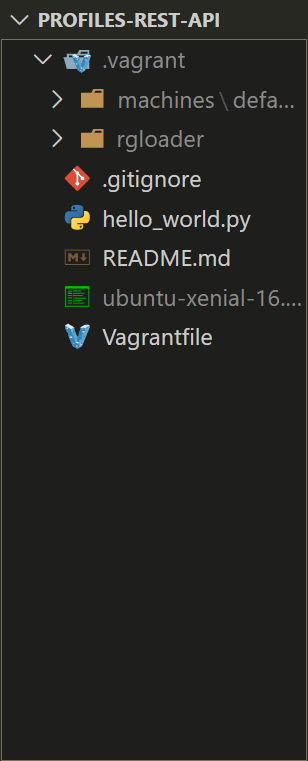
Vagrantfile 생성 및 Vagrant box 설정
https://gist.github.com/LondonAppDev/d990ab5354673582c35df1ee277d6c24
byob Vagrantfile
byob Vagrantfile. GitHub Gist: instantly share code, notes, and snippets.
gist.github.com
위 링크를 따라 vagrantfile 작성
# -*- mode: ruby -*-
# vi: set ft=ruby :

# All Vagrant configuration is done below. The "2" in Vagrant.configure
# configures the configuration version (we support older styles for
# backwards compatibility). Please don't change it unless you know what
# you're doing.

# vagrant 최신 버전 정보
Vagrant.configure("2") do |config|
  # The most common configuration options are documented and commented below.
  # For a complete reference, please see the online documentation at
  # https://docs.vagrantup.com.

  # Every Vagrant development environment requires a box. You can search for
  # boxes at https://vagrantcloud.com/search.

  # configue vm.box vagrant server에 사용할 이미지
  config.vm.box = "ubuntu/xenial64"

  # 네트워크 설정
  config.vm.network "forwarded_port", host_ip: "127.0.0.1", guest: 8080, host: 8080

  # 서버를 처음 시작할 때 실행되는 코드
  config.vm.provision "shell", inline: <<-SHELL
    #Update and upgrade the server packages.
    sudo apt-get update
    sudo apt-get -y upgrade

    # Set Ubuntu Language
    sudo local-gen en_GB.UTF-8

    # Install Python, SQLite and pip
    sudo apt-get install -y python3-dev sqlite python-pip

    # Upgrade pip to the latest version.
    sudo pip install --upgrade pip

    # Install and configure python virtualenvwrapper.
    sudo pip install virtualenvwrapper
    if ! grep -q VIRTUALENV_ALREADY_ADDED /home/vagrant/.bashrc; then
      echo "# VIRTUALENV_ALREADY_ADDED" >> /home/vagrant/.bashrc
      echo "WORKON_HOME=~/.virtualenvs" >> /home/vagrant/.bashrc
      echo "PROJECT_HOME=/vagrant" >> /home/vagrant/.bashrc
      echo "source /usr/local/bin/virtualenvwrapper.sh" >> /home/vagrant/.bashrc
    fi
  SHELL

end
GitBash 실행 -> vagrant 서버 실행
$ vagrant up
- 맨 처음 command하는 것이기 때문에 인터넷에서 이미지를 다운로드 받아야 한다.
- 이미지는 수백 MB에서 GB
서버 연결
$ vagrant ssh
원격 서버(ex. AWS, digital ocean or somewhere)에 연결
Hello World! 찍어보기
에디터로 파이썬 파일 생성 -> 코드 작성
print("Hello World")
vagrant 서버에서 실행

편집기 상태

'인문학도 개발일지 > 웹프로그래밍' 카테고리의 다른 글
| Build a Backend REST API with Python & Django - requirements.txt (0) | 2020.07.29 |
|---|---|
| Build a Backend REST API with Python & Django - 장고 앱 생성 (0) | 2020.07.29 |
| Build a Backend REST API with Python & Django - 프로젝트 기본 설정 (0) | 2020.07.28 |
| Build a Backend REST API with Python & Django - 사용 기술 (0) | 2020.07.28 |
| [python] 점프투파이썬 정규표현식 지원 모듈: re (0) | 2020.07.13 |


